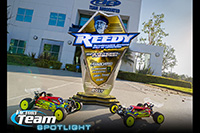
Ask any racer what the hardest event in the world to win is, and most likely they won't say, "the World Championships;" they will say, "the Reedy Race." Hosted by OCRC Raceway in Huntington Beach, CA the Reedy International Off-Road Race of Champions continues to bring the best of the best together to compete in a unique, head-to-head combined 2WD and 4WD buggy format while offering an Open class for the non-invitational drivers that is challenging in its own right. In this Factory Team Spotlight we dive into the winning Team Associated vehicles from 3-time Reedy Race Invitational Champion Ryan Cavalieri, Brent Thielke, and Broc Champlin.
Front End You know it's a big race when Cav brings out the gold turnbuckles. By his own admission, he likes to do something a bit special for the Reedy Race. A keen eye will also spot the rubber plugs in the carbon-fiber shock towers to keep dirt from building up during those rare crashes for the 4-time World Champion. Additionally, you'll notice Ryan puts a small notch on his spring collar so when he's making ride height adjustments, it's easier to make accurate adjustments.
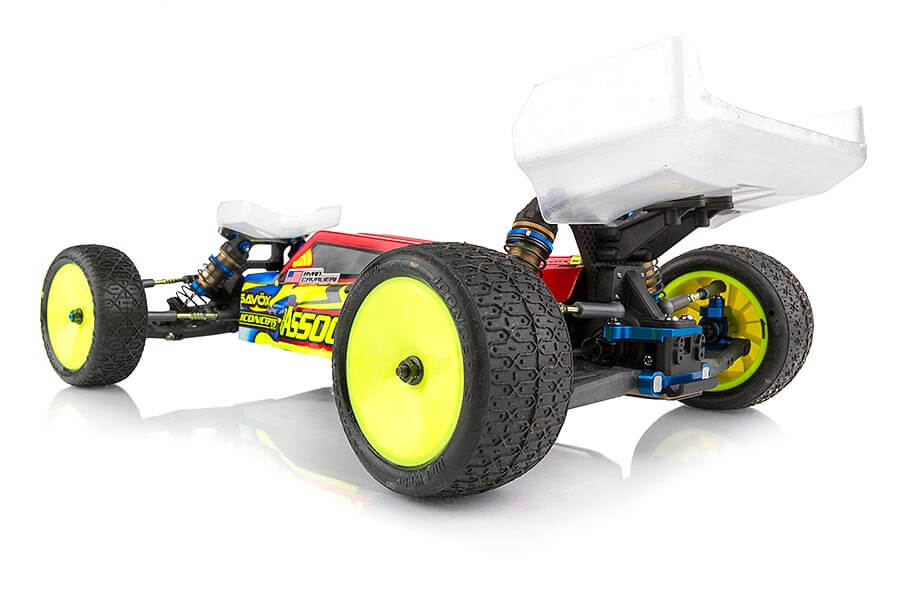
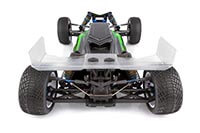
Rear End Featured here are the first generation of B6 aluminum hubs. These hubs allow for axle height adjustments, along with ballstud height adjustments and CVA pivot point adjustments. In the future, a different version of the Factory Team B6 hub will be produced that more closely resembles the styling of the captured CVA pin design of the B5 generation of vehicles. One more small detail that Ryan likes to do is paint his springs. This keeps them looking fresh and gives them that factory touch.
Inside Rear End Recognized by their gray tint, Ryan chose to use the #91653 Side Rails, hard, and #91696 Rear Arms, hard. Both of these reduce flex and allow for a precise handling car on the high-grip track of OCRC. A keep observer will also spot the unique color of the #91197 LCF Slipper Pads that debuted at this event. Giving the power delivery a smoother, more consistent feel, the extra cost of this new slipper pad is well worth the added benefit.
Inside Front End The white transponder immediately grabs the eye in this photo and was a special edition sold with benefits going to Japanese Relief during 2011's historic earthquake and tsunami season. Ryan continues to cycle these through his vehicles and feels they are good luck. This will be the only item that isn't retired from his race-winning vehicles. There are a few other standout Factory Team parts shown here, like the #1366 FT Aluminum Servo Horn, 25T, and #91680 FT Steering Block Arms, +1. Both of these items change the characteristics of the steering handling and give Ryan the feel he's looking for.
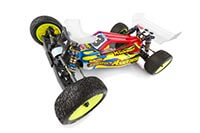
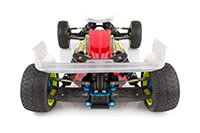
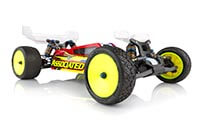
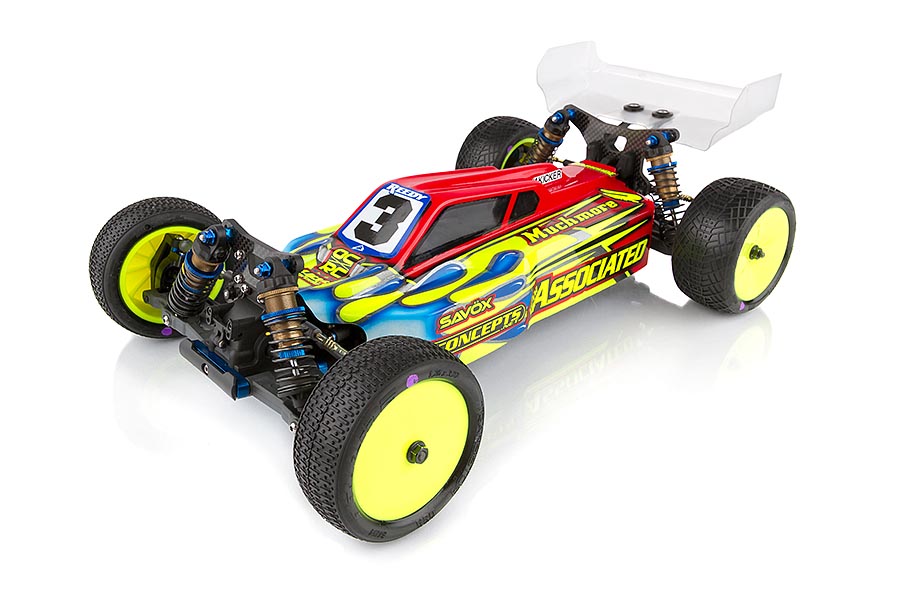
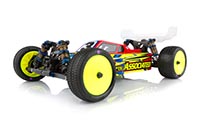
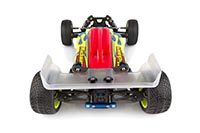
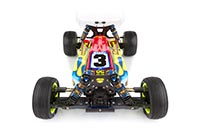
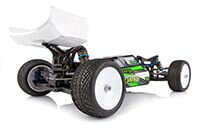
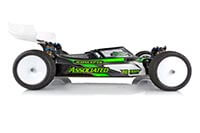
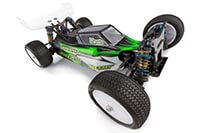
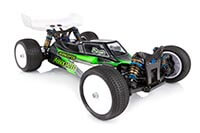
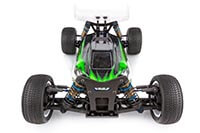
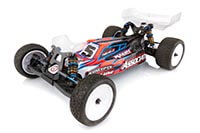
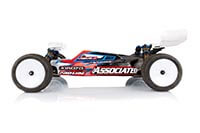
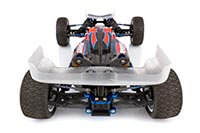
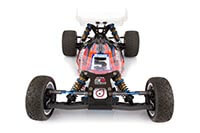
Body and Wing Putting the final touches on the Invitational winning 2WD from the Reedy Race is the JConcepts&traqde; Aero Long Cord Wing in the rear and the Aero B6 Narrow Front Arm Gullwing in the front. Then to top it off is the JConcepts&traqde; S2 B5M Light Weight Body featuring the iconic red, yellow and blue paint scheme. Like all competitors in the event, Ryan used the spec JConcepts&traqde; Space Bar front tires in gold and JConcepts&traqde; Dirt Web rear tires in gold as well.
Gallery: Ryan Cavalieri's B6D
Front End What's not to like here from the newly released B64D? Ryan and the other drivers in the Invitational class debuted the brand new 4WD buggy from Team Associated at the event and came away with more wins than any other team. Built pretty much stock from the kit, Ryan added his usual gold turnbuckles and titanium screws to give the car his personal touch along with a few option parts like #92026 Front Arms, hard, and #92030 Aluminum Caster Blocks, 13 Deg.
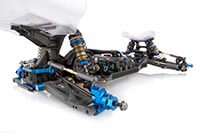
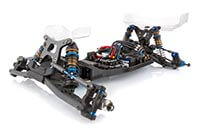
Rear End If you look closely, you can see that Ryan chose to run the #92010 Gearbox Shim Set to raise his rear gearbox. This not only changes the roll center, shock height, and other geometric characteristics, it also raises the outdrives to give a different power delivery feel. Look for the team to use this tuning option quite a bit in events to come. Much like the front, Ryan chose to use the #92049 Rear Arms, hard, to tune the flex of the suspension.
Inside Front End With so many new adjustments in the B64D it's sometimes a challenge to know where to start with the tuning. Ryan relied on his pre-race testing to establish a baseline setup that he knew would evolve with the ever-changing Reedy Race track. Going forward, Ryan and the team will test different combinations of: ballstud heights, locations, axle heights, roll centers, and all the other adjustments on the new platform to continue evolving the setup. One thing that will most likely always be in that setup, though, is the #1363 FT Aluminum Servo Horn, 18.5mm, that you see just peeking out.
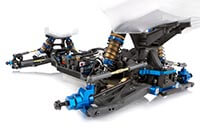
Inside Rear End Mmmmm ... Kashima! Ryan used the Team Associated exclusive #91576 and #91577 FT FOX® Shocks with Genuine Kashima coat shock bodies on both of his vehicles. He also uses #91616, #91618 and #91620 V2 Chrome Shock Shafts that he polishes to a mirror finish to give him that butter-smooth shock action. Diving deeper in to the rear end specifically, you'll notice a lack of a fan on the motor. This is something that will begin to show up later in the season when temperatures rise or when racing on carpet.
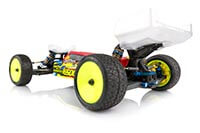
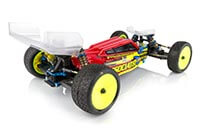
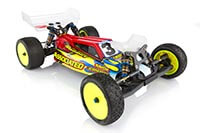
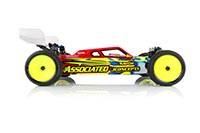
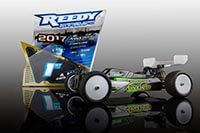
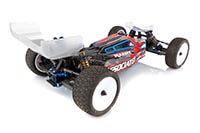
Body and Wing Mimicking the styling from its 2WD brother, Ryan used the kit B64 body in lightweight with #91743 Adhesive Hook and Loop to secure it to the side guards. Ryan also chose to remove the nubs from the body mounts to give the body a flat surface to sit on. Providing the downforce in the rear is again the JConcepts™ Aero Long Cord wing, scuffed to perfection with some Scotch-Brite™.
Gallery: Ryan Cavalieri's B64D
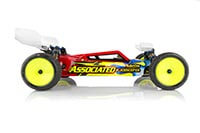
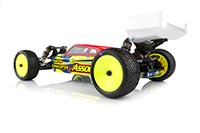
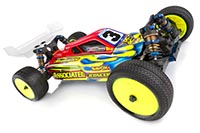
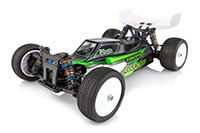
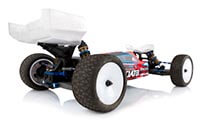
It's not often that we feature a discontinued vehicle, but this is a unique circumstance. At the Reedy Race, the Open class drivers used the B44.3, while the Invitational drivers used the B64D. The B44.3 of Broc Champlin may go down as the last major win for the game-changing platform. As we dive through Broc's winning vehicle, you'll notice modifications the team has done throughout the lifespan of the car to improve durability and tunability.
Front End Like many B44.3 drivers, Broc converted his ballcups and ballstuds to #91453 Heavy Duty Ball Cups. This requires quite a bit of work, with some areas of the car needing re-threading along with a selection of 6mm (#91047), 8mm (#91048) and 10mm (#91049) Heavy-duty Ballstuds. Like Cavalieri, Broc also chose to plug his front shock tower holes with rubber inserts to limit dirt collection.
Rear End Looking closely, you can see some nicks on the CVA bone where it hits the diff outdrive. This is due to the high diff height and significant dogbone plunge of the B44.3 geometry. Broc also used the stock #9925 Clamping Wheel Hex to maximize the overall track width. A wider hex will allow the car to slide more through the corners and with Broc's hard driving style, this suits him.
Inside Front End To increase the rigidity of the front shock tower area, Broc installed #9783 FT Front Tower Mount, aluminum, which reduces flex from the front shock tower to the top deck. This also adds a few grams of weight to the front of the car compared to the plastic kit version.
Inside Rear End For many years the B44.3 only had one choice of toe-in: the plastic 2.5-degree kit mount. However, in the past few years the #9727 FT Aluminum 3-Degree Toe Plate was added to the options and with the B44.3 chassis layout, this helped keep the rear end under the car. Broc has installed it in his winning car along with #91578 FT 12x31 FOX® Shock Bodies with Genuine Kashima Coat.
Click on the targets to learn more about the components.
Electronics Broc is sponsored by Reedy Power and utilized the full range of products offered, including the #27004 Blackbox 510R with #27028 Blackbox 30x30x7mm Fan installed. Additionally, Broc chose the #27107 Reedy RT2207A Digital HV Hi-Torque Aluminum Competition Servo to provide consistent steering, Reedy Sonic 540-M3 5.5-turn motor to lay down the horsepower, and #27307 Reedy Zapper 5800mAh 70C battery to power the whole system.
Gallery: Broc's B44.3 car
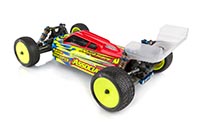
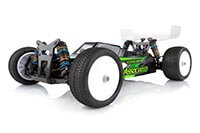
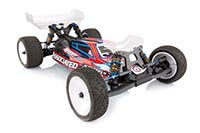
Team Manager ... Team Driver ... it’s a blurred line when discussing Team Associated’s Brent Thielke. With over 25 years of experience in the industry and over a dozen as the Team Manager for Team Associated, Brent’s commitment to the sport is undeniable. In 1997 Brent raced his very first Reedy International Off-Road Race of Champions at MnM Raceway in Corona, CA, and now fast-forward 20 years and a lifetime goal has been achieved. Join us as we take a tour through his 2017 2WD Open-winning B6 vehicle from the Reedy International Off-Road Race of Champions.
Front End Peeking out from under the #91722 B6 Ballcups are the recently released Factory Team HD Ti Ballstuds. Found throughout the car, each ballstud not only saves a little weight, but the mirror-like finish reduces drag to ensure free movement of the suspension. Brent has also outfitted his car with the #91755 Factory Team Ti Screw kit which again reduces weight and lowers the center of gravity. The sharp eye will also notice that the size of heat shrink on Brent’s springs are about half the size of the supplied version. He customizes this to keep the standard look but minimize the impact of the coloring.
Rear End The contrast, the #91696 Rear Arms, hard, really stand out in this photo. The team feels that the harder plastic helps settle the car over larger jumps and this is part of Brent’s “standard trim.” If you look closely, you can see that the hub insert for the camber link is carbon fiber. These were one-off parts given to Brent just before the race. Look for a Factory Team version in aluminum to be released soon.
Inside Front End Like most of the team, Brent chooses to use the #1366 Factory Team Aluminum Servo Horn, 25T, 15.5mm, on his Reedy servo. Additional Factory Team parts include #91680 Steering Block Arms, +1, which change the steering characteristics of the car to provide a slightly more numb feel so the car can be pushed harder. In the caster blocks, Brent chooses to use #25215 steel lock nuts as he feels they hold a bit better than their aluminum counterpart. Due to the load on the suspension, these ballstuds can work their way free and can cause that oh-s-dreadful DNF.
Inside Rear End To give the rear end of the car a more plush feel, Brent chose to use the #91666 Long Shock Tower and #91578 31mm FOX® Shock Bodies with Kashima Coat. This setup allows for more oil to reside above the piston and therefore more oil volume for the piston to flow through. Brent also used a #91737 M3 x 20mm Set Screw and #25215 Steel M3 Locknut combination to secure his lower shock mount. With the tight quarters, the standard button head screw can easily strip out. The set screw/nut combination allows the use of the #1568 Factory Team 5.5mm Short Nut Driver to more easily service the rear shocks while not stripping out the standard button head screw. Brent also consciously chose to use steel screws to secure his rear shock tower to the transmission case because he wanted the more durable 2mm footprint for the wrench.
Click on the targets to learn more about the components.
Electronics Full Reedy power is what you’d expect from the Team Manager and that’s what you get. Brent chose all the latest products to power his winning B6. From the #27100 Reedy RS1206 servo, to the #27004 Reedy Blackbox 510R speed control, to the #27307 Reedy Zapper battery, and #260 Reedy M3 7.5 motor -- it’s all powered by Reedy. Brent has tuned his entire package to fit his smooth style and all the details can be found on his Blackbox 501R setup sheet.